Christmas Nails - Part 2
Happy Christmas Eve Everyone.
Yesterday I posted Part 1 of my Christmas Day mani and today I have the rest of it.
I decided I wanted to create some Icy Blue nails that resemble luxury wrapping paper.
All the products I used for the rest of this mani were purchased from Rainbow Connection and some are still available.
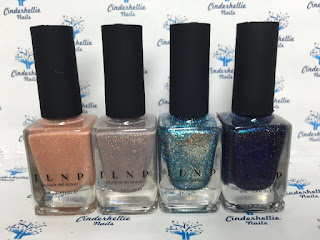
I started by painting 2 coats of Cirque Colours Idyllic on my ring and middle fingers and Reflektor on my index and thumb (Reflektor is no longer available) These colours were perfect for my icy look and definitely look luxurious on the nail - they dry quite quickly too.
Once dry I put some latex around my middle and index ready to do a sponged gradient. You can get Zap from RC but I have a big bottle from Ebay which I use. Let the latex dry. *Please don't use liquid latex if you have a latex allergy - you can use tape around the nail instead*
Using a cosmetic sponge (I have a bag from the pound shop) apply 2 stripes of your polishes onto the sponge and sponge on the nail. Keep repeating this until you achieve the depth of colour you want, I think I did this 5 times before I was happy.
It's really hard to capture the gradient in a picture because the polishes are so reflective but trust me it is there! When dry you can remove the latex. I then use my clean up brush and remover if needed to really neaten around the cuticle.
Then top coat using your favourite top coat - mine is HK Girl!
My nephew Ryan very kindly took this picture.
But I wasn't finished there!
I then decided to add some stamping using
On my middle and index finger I chose individual snowflakes from the 2 plates, after I had picked up on my stamper I used my scraper and tape to remove any bits I didn't want before stamping a few snowflakes on my nails.
I used a clear stamper to position them
Finally top coat again with HK Girl and clean up any stamping around the nail.
And here is my finished mani - It is everything I had in mind for this.
The 1st part to this mani which shows how I did my pinky can be found here.
Thank you for taking the time to read all my posts throughout the year, it means so much to me and I hope you have found them interesting and helpful.
I would like to wish you all and your families a very very Happy Christmas, I hope Santa brings you all everything you want (lots of Polish!!!!)
As this my last post of 2016 I also wish you all a very happy and healthy new year.
See you in 2017.
Love
Helen aka Cinderhellie xx
Yesterday I posted Part 1 of my Christmas Day mani and today I have the rest of it.
I decided I wanted to create some Icy Blue nails that resemble luxury wrapping paper.
All the products I used for the rest of this mani were purchased from Rainbow Connection and some are still available.
I started by painting 2 coats of Cirque Colours Idyllic on my ring and middle fingers and Reflektor on my index and thumb (Reflektor is no longer available) These colours were perfect for my icy look and definitely look luxurious on the nail - they dry quite quickly too.
Once dry I put some latex around my middle and index ready to do a sponged gradient. You can get Zap from RC but I have a big bottle from Ebay which I use. Let the latex dry. *Please don't use liquid latex if you have a latex allergy - you can use tape around the nail instead*
Using a cosmetic sponge (I have a bag from the pound shop) apply 2 stripes of your polishes onto the sponge and sponge on the nail. Keep repeating this until you achieve the depth of colour you want, I think I did this 5 times before I was happy.
It's really hard to capture the gradient in a picture because the polishes are so reflective but trust me it is there! When dry you can remove the latex. I then use my clean up brush and remover if needed to really neaten around the cuticle.
Then top coat using your favourite top coat - mine is HK Girl!
My nephew Ryan very kindly took this picture.
But I wasn't finished there!
I then decided to add some stamping using
- Creative Shop Plates 36 & 37
- EDK - Dolly
- Hit the Bottle - I blue it all on Polish
On my middle and index finger I chose individual snowflakes from the 2 plates, after I had picked up on my stamper I used my scraper and tape to remove any bits I didn't want before stamping a few snowflakes on my nails.
I used a clear stamper to position them
Finally top coat again with HK Girl and clean up any stamping around the nail.
And here is my finished mani - It is everything I had in mind for this.
The 1st part to this mani which shows how I did my pinky can be found here.
Thank you for taking the time to read all my posts throughout the year, it means so much to me and I hope you have found them interesting and helpful.
I would like to wish you all and your families a very very Happy Christmas, I hope Santa brings you all everything you want (lots of Polish!!!!)
As this my last post of 2016 I also wish you all a very happy and healthy new year.
See you in 2017.
Love
Helen aka Cinderhellie xx


Comments
Post a Comment