Posts

Showing posts with the label EDK

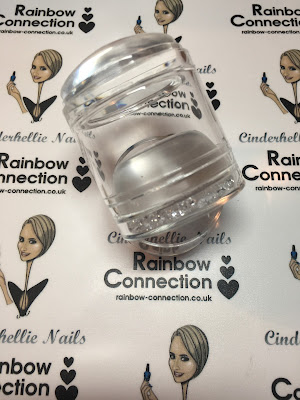
Review of new Rainbow Connection Crystal Stamper
Image
Hello all my lovely nail friends, I am back...I am still struggling with my health and off work but I'm trying to get myself back and with that trying to find my nail passion again so I thought blogging again would be a good place to start. I have also made some changes to my Facebook page as I'm still not working it is my swatch and review page at present, I am also attempting short video tutorials and will hopefully be venturing into YouTube soon!!! So today's post is a review of the new 2 in 1 Crystal Embellished stamper the lovely Annette from Rainbow Connection sent me. This stamper has 2 large stamping heads with see through barrels and can be stacked for easy storage, it has a lid to protect the stamping head and crystals in the bottom. Each head is different 1 is domed and firmer while the other is flatter and slightly squishier (I prefer this one) although it is not as squishy as my all time favourite!! As with my previous reviews I chose to swa...

Christmas Nails - Part 2

Image
Happy Christmas Eve Everyone. Yesterday I posted Part 1 of my Christmas Day mani and today I have the rest of it. I decided I wanted to create some Icy Blue nails that resemble luxury wrapping paper. All the products I used for the rest of this mani were purchased from  Rainbow Connection  and some are still available. I started by painting 2 coats of Cirque Colours Idyllic on my ring and middle fingers and Reflektor on my index and thumb (Reflektor is no longer available) These colours were perfect for my icy look and definitely look luxurious on the nail - they dry quite quickly too. Once dry I put some latex around my middle and index ready to do a sponged gradient. You can get Zap from RC but I have a big bottle from Ebay which I use. Let the latex dry. *Please don't use liquid latex if you have a latex allergy - you can use tape around the nail instead* Using a cosmetic sponge (I have a bag from the pound shop) apply 2 stripes of your polishes onto the spon...

Reverse Stamping Tutorial

Image
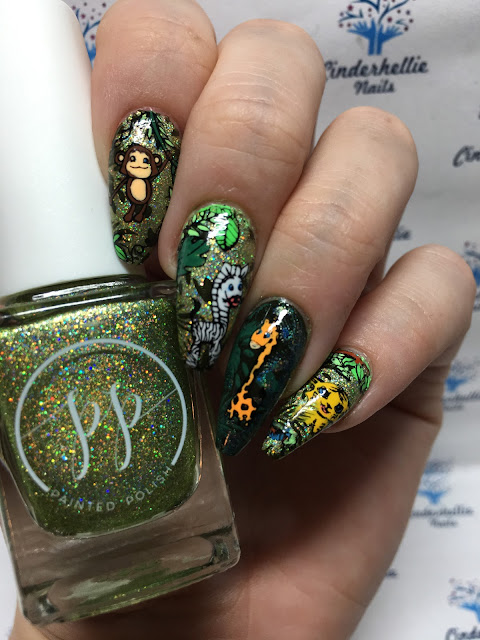
Hi Everyone, I have another tutorial post for you today - last week I did a step by step for making decals and today I'm going to do a step by step for reverse stamping. For those of you who are unsure reverse stamping is when you colour in an image on the stamper head and then stamp onto the nail, you can also peel it off and apply like a decal if you prefer. I run a weekly challenge in a group on Facebook and last week the theme was Welcome to the Jungle which I had the perfect stamping plate for and using the reverse stamping method I created these. So here is how I created them -  You will notice from the step by step pictures there is a change to the final mani and I will explain why at the end! I started with 2 coats of Painted Polish 'Charmed at the Chateau and top coated it. Using Painted Polish Midnight Mischief (In my opinion this is the best stamping/one coater black around) I picked up my chosen images on separate stampers - I only have 3 clear whi...

Presenting Picture Polish Alice

Image
Hi Everyone, I have been planning this post for a while now and I wanted to make sure it was perfect and I'm finally happy with what I'm posting today. Several months ago my lovely friend Annette from Rainbow Connection let myself and the Polished Prince Karl into a little secret - she was collaborating with Aussie Indie brand Picture Polish for her own polish. Well I cannot tell you how happy and excited Karl and I were. We were even more excited when we got a sneak peek of the shade a week or so later and OMG she could have designed it for me - it was the ultimate Helen polish!! Well Karl and I somehow managed to keep the most exciting secret until the release and 2 weeks ago Alice was finally revealed and launched to the polish community. Annette's inspiration for this polish was the wonderful Alice in Wonderland and I really think the colour has been captured perfectly. This really is the most vibrant blue with little silver flakies and it is a perfect match...

Esmaltes da Kelly Stamping plate review

Image
Hi everyone, Firstly I must apologise for my lack of blogging in recent months, I have had some personal things going on and blogging has had to take a back seat but i'm going to attempt to get back into it. Today I have swatches and review of the new EDK stamping plates I got from Rainbow connection and a new stamper I also got from there, so lets get on with it! So these are the products i'm trying, Kelly Negri plates - KN2, KN3, KN4 and the new short barrel clear stamper. The plates are 8x8cm with a selection of images on them and there are some really nice images. Plate KN2 has 12 images. my favourite is the daisy image but I also like the checkerboard illusion one. Here are some swatches from this plate - Plate KN3 has 13 images including a big flower one which I think would be perfect for reverse stamping, these images are smaller and I think would be ideal for double stamping and decal making, the flowerpots are so cute. Finally KN4 ha...