Reverse Stamping Tutorial
Hi Everyone,
I have another tutorial post for you today - last week I did a step by step for making decals and today I'm going to do a step by step for reverse stamping.
For those of you who are unsure reverse stamping is when you colour in an image on the stamper head and then stamp onto the nail, you can also peel it off and apply like a decal if you prefer.
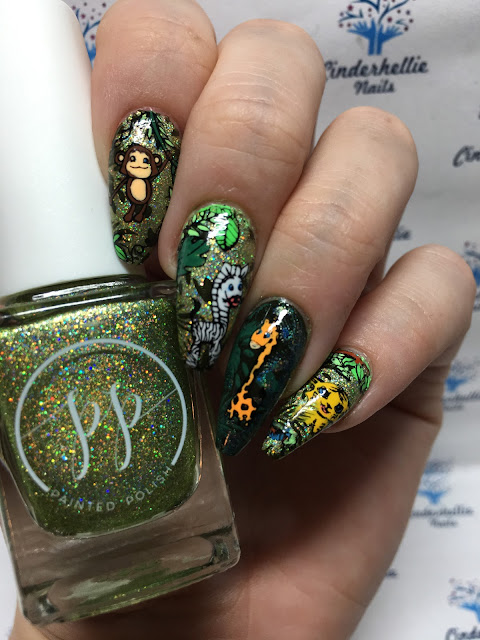
I run a weekly challenge in a group on Facebook and last week the theme was Welcome to the Jungle which I had the perfect stamping plate for and using the reverse stamping method I created these.
So here is how I created them - You will notice from the step by step pictures there is a change to the final mani and I will explain why at the end!
I started with 2 coats of Painted Polish 'Charmed at the Chateau and top coated it.

Using Painted Polish Midnight Mischief (In my opinion this is the best stamping/one coater black around) I picked up my chosen images on separate stampers - I only have 3 clear which is why there is a normal stamper there isn't any other reason for it! You don't have to use clear stampers its a personal preference as I like perfect placement!
I then top coat the images with my The Edge top coat but you can use any its just to stop the oitline lifting when you colour in the images.

Then the fun part - colouring in!! I use the EDK stamping polishes for this because they are so bold and pigmented and dry really fast, and I use fine brushes and small dotting tools. I also kept holding over my nail as if I was stamping (without touching) to check I'd coloured all that I would be transferring purely so I didn't waste time colouring bits I didn't need to!


These are all the EDK polishes I used - as you can see just a couple!
 Base colours, and top coats used.
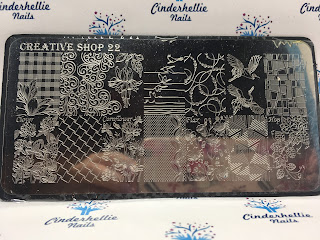
 My brush and dotting tool and the images were taken from Bundle Monster BM-S165 and BM-XL204

As I said at the beginning this was a challenge on Facebook and it was in the Rainbow Connection group so all the polishes and plates and stampers were from Rainbow Connection
The Edge top coat is just one I had - cant remember where from but you could use any standard top coat instead of this one.
Dotting tool and brush was in my tool kit.
I really hope this helps some of you - please leave me any comments below.
For more nail art, swatching etc please follow me on Instagram - @cinderhellienails, Twitter - @cinderhellie and Facebook - Cinderhellie Nails.
Thanks for reading
Helen aka Cinderhellie xx
I have another tutorial post for you today - last week I did a step by step for making decals and today I'm going to do a step by step for reverse stamping.
For those of you who are unsure reverse stamping is when you colour in an image on the stamper head and then stamp onto the nail, you can also peel it off and apply like a decal if you prefer.
I run a weekly challenge in a group on Facebook and last week the theme was Welcome to the Jungle which I had the perfect stamping plate for and using the reverse stamping method I created these.

So here is how I created them - You will notice from the step by step pictures there is a change to the final mani and I will explain why at the end!
I started with 2 coats of Painted Polish 'Charmed at the Chateau and top coated it.

Using Painted Polish Midnight Mischief (In my opinion this is the best stamping/one coater black around) I picked up my chosen images on separate stampers - I only have 3 clear which is why there is a normal stamper there isn't any other reason for it! You don't have to use clear stampers its a personal preference as I like perfect placement!
I then top coat the images with my The Edge top coat but you can use any its just to stop the oitline lifting when you colour in the images.

Then the fun part - colouring in!! I use the EDK stamping polishes for this because they are so bold and pigmented and dry really fast, and I use fine brushes and small dotting tools. I also kept holding over my nail as if I was stamping (without touching) to check I'd coloured all that I would be transferring purely so I didn't waste time colouring bits I didn't need to!

And this is what it should look like when you look down the barrel.

Once all your colouring is dry you need to top coat again - I did all 4 as once I'd done the last the 1st one was about ready to stamp. You don't want to use a fast drying top coat for this step either just a bog standard normal one.
Once the top coat is tacky you then stamp onto the nail as you would normally stamp - if you normally roll the stamper over the nail don't do this you need to push it down onto the nail and lift in one go. I lift slowly to make sure the whole image is stuck as if its not you can see and push back down. The top coat needs to be tacky so it sticks to the nail but if you do it too soon and it is quite wet you risk it slipping and smudging which is what happened on my ring finger!
Then top coat with your favourite top coat - mine is glisten and glow HK girl.
Finally clean up any mess or excess transfer from around your nail using a clean up brush and acetone.

Here is my final mani - now as I said I messed up the ring finger so had to clean off and redo so I did a quick coat of Painted Polish 'Stamped in Olive' another one coat wonder then using one of the EDK holos stamped a foliage image. On a clear stamper I stamped the giraffe image then cleaned off everything but the giraffe with my lint roller, coloured in and stamped as before - and that was my quick save from the messed up nail!

These are all the EDK polishes I used - as you can see just a couple!


As I said at the beginning this was a challenge on Facebook and it was in the Rainbow Connection group so all the polishes and plates and stampers were from Rainbow Connection
The Edge top coat is just one I had - cant remember where from but you could use any standard top coat instead of this one.
Dotting tool and brush was in my tool kit.
I really hope this helps some of you - please leave me any comments below.
For more nail art, swatching etc please follow me on Instagram - @cinderhellienails, Twitter - @cinderhellie and Facebook - Cinderhellie Nails.
Thanks for reading
Helen aka Cinderhellie xx

Comments
Post a Comment