Thumbs Up Nail Wraps Mani
Happy Monday Everyone.
A while back I purchased some nail wraps from Thumbs Up Nails (I will leave all the links below) I loved all the different designs they had and how it was instant nail art but I have been putting off using them as to be honest I was a little bit scared! So over the weekend I decided to use some nail wraps to create my mani and I don't know why I was worried they were so easy to use.
So here's my step by step -
1) For this mani I used the Thumbs up Nail Wraps called Rors Chach you also get a file and orange stick with them which you need, Grace-full polish in Grape Gumdrop (a rainbow connection exclusive) Glisten and Glow HK girl topcoat from RC and Leighton Denny one for all.
2) I painted 2 coats of Grape Gumdrop on my chosen finger and 1 coat of One for All on my ring finger and thumb (you don't have to base coat the full nails but I did!) (and yes I do have extensions on because my nails were making me sad)
3) Take the chosen nail wraps out of the pack, they look like this. You need to select the right size wrap for the finger you are working on, peel off the cover and then peel off the wrap from the silver strip - so far easy!
4) Starting at the cuticle line the wrap up and stick it down pushing out any creases, if you get it wrong you can peel it straight off and re-do. Be sure to push it down firmly making sure its flat to the nail. It should then look like this - how cool is that design! I then cut off a bit of the excess and pulled it over my free edge then using the file and a downward action I filed of the rest - again really easy!
5) For the nails I had painted I just wanted to do a tip and as it was my 1st attempt I went for a straight line tip. again I chose the wraps that best fitted my nails but I found there was a little more room for error here as they stretched nicely. Anyway before peeling off the wrap I cut them in half.
6) I then lined up and stuck down 1 of the halves at the tip. I started from one side so I could stretch it right to the other side, then gave it a good press down. As before I pulled it over the free edge and filed of the excess.
7) Then I used the other half on the other hand and repeated the process! - So Easy!!
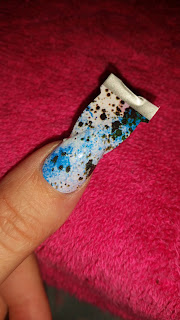
8) finally I finished off with a coat of HK Girl top coat making sure I sealed in the free edge and here is the finished mani. It took me 45 minutes to create this and thats both hands (and another 45 to get the perfect picture!) Honestly so easy to work with.
And who doesn't love a macro!
* I have now removed this mani and it was easy to remove - you can either peel the wraps off or use your normal polish remover.
So the links -
Thumbs Up Nails - http://www.thumbsupnails.co.uk/
and check out their Instagram - @thumbsupnails
Rainbow Connection - www.rainbow-connection.co.uk
and on Instagram - @rainbow_c_uk
Grace-Full polish IG - @gracefullnailpolish
Glisten and Glow (topcoat) IG - @glistenandglow1
Leighton Denny IG - @leightondennynails
I hope you enjoyed this, If so please leave me a comment below, I'd love to know if you have tried these wraps too.
Love
Helen aka Cinderhellie xx


Comments
Post a Comment