Holo Nails - how to and how I created my pink bling mani
Happy Monday Lovelies,
I hope you have all had a great bank holiday weekend? Mine hasn't quite gone to plan so I thought I would bring you this post on how I created my latest Gel Mani.
I often like to use gel on my nails as I can then forget about them for a week or so and they still look perfect, I am fully qualified in gel polish application and as it's a treatment I offer my clients I have a huge range of colours - If you would like to see more gel polish posts please let me know.
Anyway I was very excited because last week I managed to get my hands on the amazing new Holo Pigment from Magpie Beauty. For those of you unfamiliar with magpie they have a fabulous line of glitters, dusts and pigments which my clients go crazy for.
Now the new release of Aurora sold out so quickly but I managed to get one so knew I needed to use it.
This is the pigment and a peek of my mani - how amazing is that pigment.

I decided that I needed to have a bit of fun and create a full out bling mani so here we go.
I got my little table all set up ready to get creative.
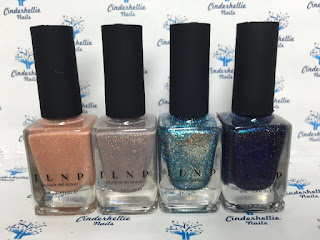
 These are all the products I used - I will list them at each step, I also used clear acrylic powder and monomer which isn't shown here.

So my 1st step was to apply my gel polish I chose Gelaze Snap Dragon which is a fab neon pink from Essential Nails, I did 2 coats curing each for 45 seconds in my LED lamp. Because I did mine straight on acrylic I didn't need base coat but if you are doing yours on natural nails make sure you do your prep and base coat. I did ensure mine were clean and dust free.
You can purchase Snap Dragon here.

I had decided I was going to do an accent nail of Crystal Pixie which I purchased from She Sells Seashells, to apply this I used Gelish Structure Gel (amazon purchase) and my Audrey Gel Brush from Team Gorgeous. I applied a coat of gel over the whole nail and then using the plastic container to catch the crystals tipped it over my nail until it was completely covered then patted down. Before I cured I put a coat of Bluesky No Wipe Top Coat (Ebay) on my remaining nails and then cured for 60 seconds in my LED lamp.
Now comes the fun part... Using Aurora I tipped the tiniest amount into the lid and using a silicon nail tool (Ebay again) I rubbed it completely over the nail - you really just need the smallest amount as it goes a long way, keep rubbing until the nail is completely covered and it should really shine - don't over rub because you don't want to scuff it.

And this is how it should look - I dusted off any extra not that there was much with a fluffy eyeshadow brush. Honestly I cannot get over how amazing they look already but I wanted more!
 At this point you need to top coat the holo in place I used my no wipe Bluesky and I also capped the free edge on my crystal pixie nail and cured for 60 seconds. If you were going to leave it there I would top coat twice but I was adding stones and bits so top coated again after that.
So the 1st this I added was a big crystal bow to my thumb nails, because of the size of this I attached it with clear acrylic from CJP Nail Systems. I picked up a small bead using my Team Gorgeous Marilyn brush placed this on the nail and put my bow on top. I find I need a slightly drier ball so it doesn't run all over the nail - I then fill in any gaps under the bow with more acrylic so it is really secure.

Finally I wanted to add some Swarovski Crystals to the nails - I didn't really have a plan with these I just went with the flow!! My crystals are from Scatter Crystal, I attach them with a small amount of structure gel and pick them up with the pointy end of my silicon tool. I flash cured in between each nail (10 seconds) so the crystals didn't slide about. When I have done all the nails I fully cured 45 seconds in my lamp. Finally I top coat again with my no wipe and I used the pointy silicon tool to apply top coat around the crystals and bow to help hold in place.

Last but not least - cuticle oil. This is my absolute favourite at the moment the Paint the Rainbow oil which Annette from Rainbow Connection makes - you can get yours here. I am using the scent Candy Cane.

And here is my finished manicure which I am absolutely in love with. It's a bit different to my usual ones but I fancied a bit of bling!! I love the holo pigment and can see why it is such a craze at the moment, it was the 1st time I have used Crystal Pixie but now I need more of the colours - Love it and Scatter Crystal is a great supplier of Swarovski crystals - I need more!!


I really hope you have enjoyed this post - it's a bit different I know so I would love to know your thoughts - is this something you would like to see again? Would you like to see more gel, glitter swatches reviews etc? please let me know.
Have a fab week ahead.
Love and lots of bling
Helen aka Cinderhellie
xx
I hope you have all had a great bank holiday weekend? Mine hasn't quite gone to plan so I thought I would bring you this post on how I created my latest Gel Mani.
I often like to use gel on my nails as I can then forget about them for a week or so and they still look perfect, I am fully qualified in gel polish application and as it's a treatment I offer my clients I have a huge range of colours - If you would like to see more gel polish posts please let me know.
Anyway I was very excited because last week I managed to get my hands on the amazing new Holo Pigment from Magpie Beauty. For those of you unfamiliar with magpie they have a fabulous line of glitters, dusts and pigments which my clients go crazy for.
Now the new release of Aurora sold out so quickly but I managed to get one so knew I needed to use it.
This is the pigment and a peek of my mani - how amazing is that pigment.

I decided that I needed to have a bit of fun and create a full out bling mani so here we go.
I got my little table all set up ready to get creative.


So my 1st step was to apply my gel polish I chose Gelaze Snap Dragon which is a fab neon pink from Essential Nails, I did 2 coats curing each for 45 seconds in my LED lamp. Because I did mine straight on acrylic I didn't need base coat but if you are doing yours on natural nails make sure you do your prep and base coat. I did ensure mine were clean and dust free.
You can purchase Snap Dragon here.

I had decided I was going to do an accent nail of Crystal Pixie which I purchased from She Sells Seashells, to apply this I used Gelish Structure Gel (amazon purchase) and my Audrey Gel Brush from Team Gorgeous. I applied a coat of gel over the whole nail and then using the plastic container to catch the crystals tipped it over my nail until it was completely covered then patted down. Before I cured I put a coat of Bluesky No Wipe Top Coat (Ebay) on my remaining nails and then cured for 60 seconds in my LED lamp.
. 

Now comes the fun part... Using Aurora I tipped the tiniest amount into the lid and using a silicon nail tool (Ebay again) I rubbed it completely over the nail - you really just need the smallest amount as it goes a long way, keep rubbing until the nail is completely covered and it should really shine - don't over rub because you don't want to scuff it.

And this is how it should look - I dusted off any extra not that there was much with a fluffy eyeshadow brush. Honestly I cannot get over how amazing they look already but I wanted more!

So the 1st this I added was a big crystal bow to my thumb nails, because of the size of this I attached it with clear acrylic from CJP Nail Systems. I picked up a small bead using my Team Gorgeous Marilyn brush placed this on the nail and put my bow on top. I find I need a slightly drier ball so it doesn't run all over the nail - I then fill in any gaps under the bow with more acrylic so it is really secure.

Finally I wanted to add some Swarovski Crystals to the nails - I didn't really have a plan with these I just went with the flow!! My crystals are from Scatter Crystal, I attach them with a small amount of structure gel and pick them up with the pointy end of my silicon tool. I flash cured in between each nail (10 seconds) so the crystals didn't slide about. When I have done all the nails I fully cured 45 seconds in my lamp. Finally I top coat again with my no wipe and I used the pointy silicon tool to apply top coat around the crystals and bow to help hold in place.


And here is my finished manicure which I am absolutely in love with. It's a bit different to my usual ones but I fancied a bit of bling!! I love the holo pigment and can see why it is such a craze at the moment, it was the 1st time I have used Crystal Pixie but now I need more of the colours - Love it and Scatter Crystal is a great supplier of Swarovski crystals - I need more!!


I really hope you have enjoyed this post - it's a bit different I know so I would love to know your thoughts - is this something you would like to see again? Would you like to see more gel, glitter swatches reviews etc? please let me know.
Have a fab week ahead.
Love and lots of bling
Helen aka Cinderhellie
xx


Comments
Post a Comment