How to apply Magpie Products
It's a new week and I hope you all have some gorgeous manicures planned. I was meant to post this on Friday but things got in the way but at least I am posting!! I will get on top of my blogging schedule soon...I promise!!
So as a nail technician I like to use lots of different products and currently one of my most popular is Magpie Beauty glitters and dusts. These are the most amazing sparkly products that can really bling up a manicure, they are fab so today I'm going to show you how I use them with gel polish.
I am going to show the application technique for glitter, dust and pigments.
Here are the products I am using -


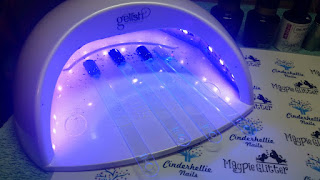
The 1st step is the same for all of the products I prepare the nail for gel application - tidy cuticles, cleanse nail then apply base coat and 2 coats of colour curing each layer. The gel polish I work with is Gelaze from Essential Nails and I cure each coat in an LED lap for 45secs
 Dust
Dust
Pour a small amount of the dust into the lid (make sure you have a paper towel down!)

Using the applicator brush I pat the product onto the tacky layer until the nail is covered
 Dust off any excess.

Pigment
I find these work best on a white base as it really makes the colour pop! Again pour some into the lid and the using your brush you need to break up the pigment.


Pat the pigment into the tacky layer - I almost push it on and keep going until the nail is covered.

Dust away any excess.

There are 2 ways to apply the glitter - sprinkling and burnishing.

To burnish again pat the glitter onto the sticky layer, then when fully covered clean your brush on some dry tissue then using circular motions rub the glitter in and this burnishes it and you get an amazing smooth finish.


To sprinkle I actually applied a 3rd coat of polish but you can do this on the 2nd. Don't cure instead sprinkle to product over the wet polish and tap away any excess and then cure for the required time. After this step dust off.


You then need to top coat all the nails need 2 coats of top coat curing inbetween however the sprinkled glitter will need 3 or 4 as this will be rough so needs more to get a smooth finish.
 Don't forget to wipe the final tacky layer with cleanser and oil the nails.
Here are the 4 finished layers, its hard to see the sparkle in the black glitter but trust me its amazing

Here is a better picture of Eartha - the top is sprinkled, the finish on both is amazing.


You can purchase Magpie Beauty products at Magpie Beauty
They can also be found on Facebook, Twitter and Instagram - definitely check them out.
The gel polish I use can be purchased at Essential Nails
I hope you found this interesting and helpful.
Have you tried Magpie Products? What are your opinions and favourites? Please leave me a comment.
Love and Glitter
Helen aka Cinderhellie xx
So as a nail technician I like to use lots of different products and currently one of my most popular is Magpie Beauty glitters and dusts. These are the most amazing sparkly products that can really bling up a manicure, they are fab so today I'm going to show you how I use them with gel polish.
I am going to show the application technique for glitter, dust and pigments.
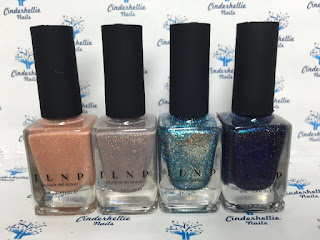
Here are the products I am using -

Gel Polish in Black, White and Pale Green

Magpie Products - Dust - Olive, Glitter - Eartha, Pigment - Izzy

I only used my applicator and duster brush but I also have the detailer brush.
The 1st step is the same for all of the products I prepare the nail for gel application - tidy cuticles, cleanse nail then apply base coat and 2 coats of colour curing each layer. The gel polish I work with is Gelaze from Essential Nails and I cure each coat in an LED lap for 45secs

Pour a small amount of the dust into the lid (make sure you have a paper towel down!)

Using the applicator brush I pat the product onto the tacky layer until the nail is covered


Pigment
I find these work best on a white base as it really makes the colour pop! Again pour some into the lid and the using your brush you need to break up the pigment.


Pat the pigment into the tacky layer - I almost push it on and keep going until the nail is covered.

Dust away any excess.

There are 2 ways to apply the glitter - sprinkling and burnishing.

To burnish again pat the glitter onto the sticky layer, then when fully covered clean your brush on some dry tissue then using circular motions rub the glitter in and this burnishes it and you get an amazing smooth finish.


To sprinkle I actually applied a 3rd coat of polish but you can do this on the 2nd. Don't cure instead sprinkle to product over the wet polish and tap away any excess and then cure for the required time. After this step dust off.


You then need to top coat all the nails need 2 coats of top coat curing inbetween however the sprinkled glitter will need 3 or 4 as this will be rough so needs more to get a smooth finish.

Here are the 4 finished layers, its hard to see the sparkle in the black glitter but trust me its amazing

Here is a better picture of Eartha - the top is sprinkled, the finish on both is amazing.

These magpie products are so mush fun to use and you can experiment with different polish/glitter combinations to create different colour finishes - the possibilities are endless!!!
Here is my Magpie collection


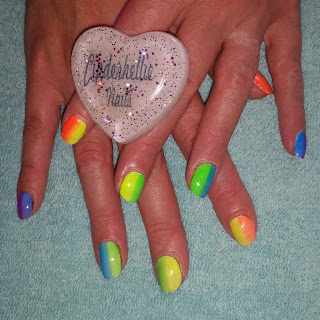
Here are some of my Magpie Manis -


They can also be found on Facebook, Twitter and Instagram - definitely check them out.
The gel polish I use can be purchased at Essential Nails
I hope you found this interesting and helpful.
Have you tried Magpie Products? What are your opinions and favourites? Please leave me a comment.
Love and Glitter
Helen aka Cinderhellie xx


Comments
Post a Comment